What is the Field Builder and why it was added | How to set up general unit fields | How to create and set up custom fields | How to assign custom fields to the units
WHAT and WHY is the Field Builder
We understand that you may want to set up different characteristics for each unit type.
That is why a brand new Field builder was created.
Field Builder is a new section of the Prompto Portal created to allow management of your default unit fields, as well as creating new custom fields.
General fields setup helps you to adjust the default template of the Unit card.
Customs fields tab allows to create and edit new fields for the units.
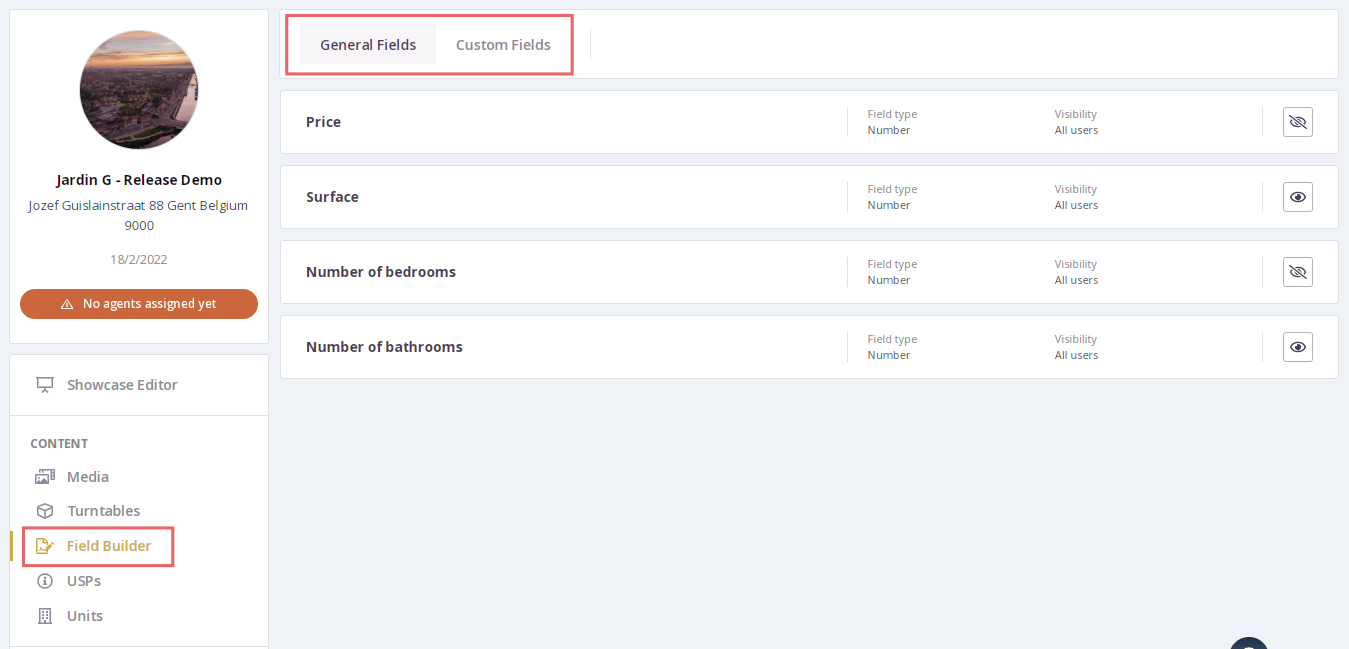
 You can find the new Field builder section in the menu. The section consists of two tabs: General fields and Customs fields.
How to set up general unit fields
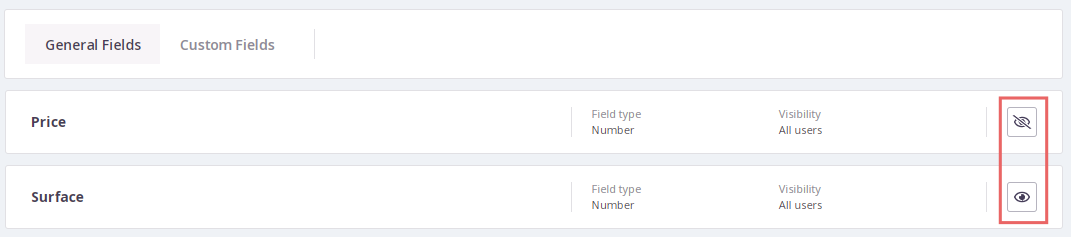
The general fields tab contains 4 Prompto default unit fields
(Price, square meters, number of bedrooms, number of bathrooms).
See the screenshot above.
If you are not a big fan of using sqr. meters, a number of bedrooms or bathrooms (our standard options) to present your offer your can switch it off easily or set them up in a non-default way: they are added in the Field Builder at the start of a project.
(no, you cannot delete them, only hide them).
Each general field can be set up:
1) Field visibility can be switched off. It is On by default. Once off the field will stop to be displayed in the showcase.
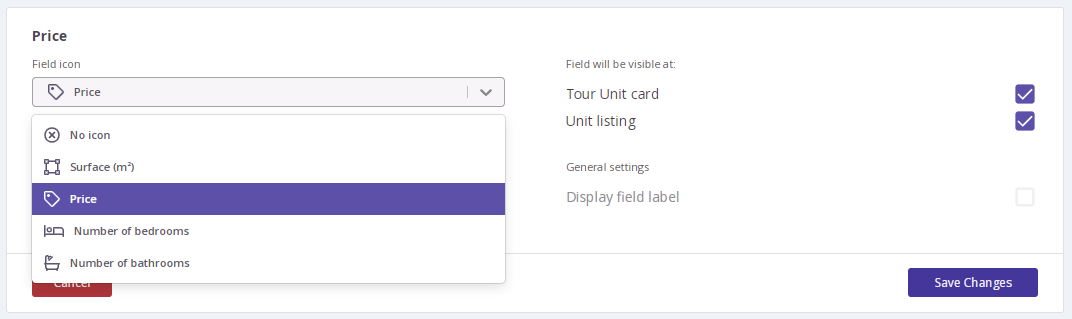
2) Change the field icon. Click on the dropdown to open the options.
3) Change field visibility based on user permissions (All users vs authorized ones).
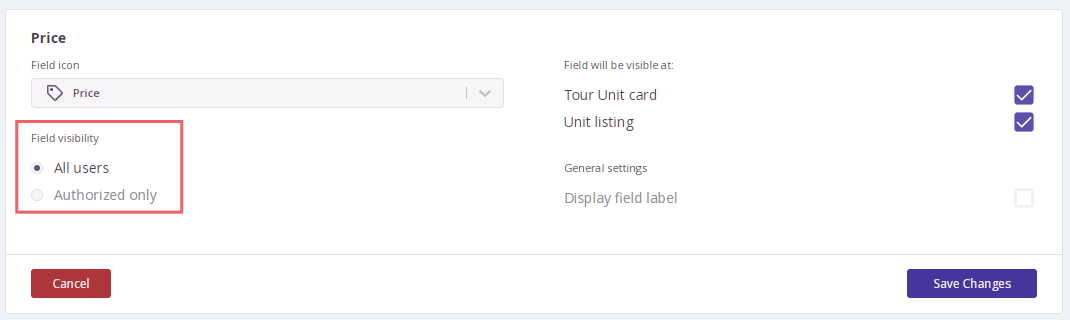
All fields are visible to all users by default. If you will change it to Authorized only then only those logged in Prompto Portal will be able to see it in the showcase.
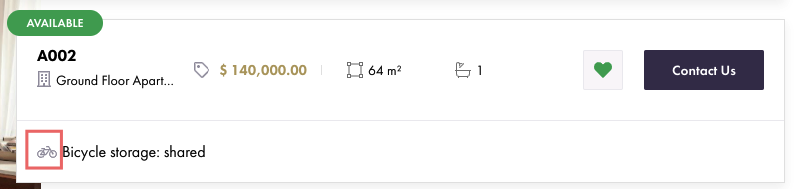
4) Set whether the fields are visible on the tour unit card and in the unit list.

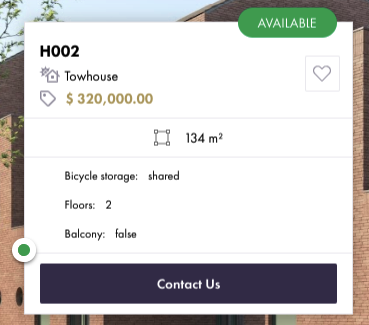
For example, the price on the tour card is visible as the checkbox is on:
How to create and set up custom fields
No custom fields are created in the Portal by default. However, once created these fields become available in all the projects under your Customer account in Prompto Portal.
Let's add and set up a new field!
Click on Add new custom field button.

In the window opened you can start setting up the field.
1) First, select the field type. It can be just some text or description field, number, checkbox, date/time picker, or dropdown.
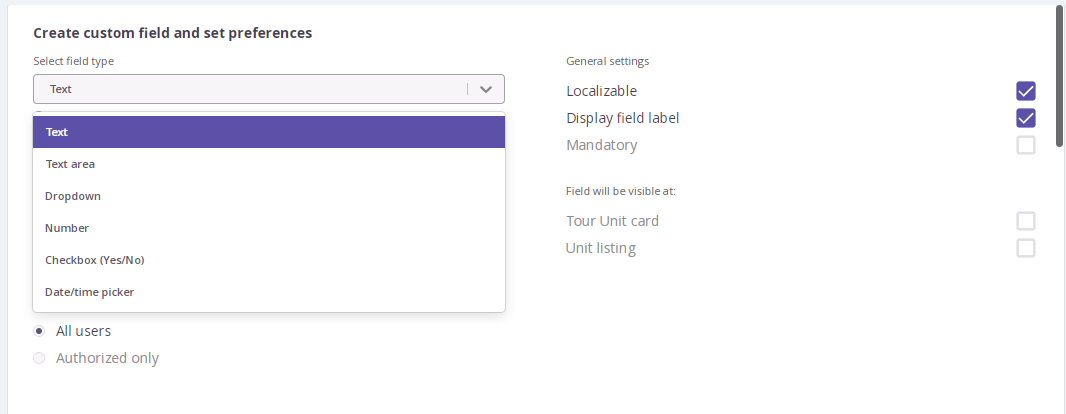
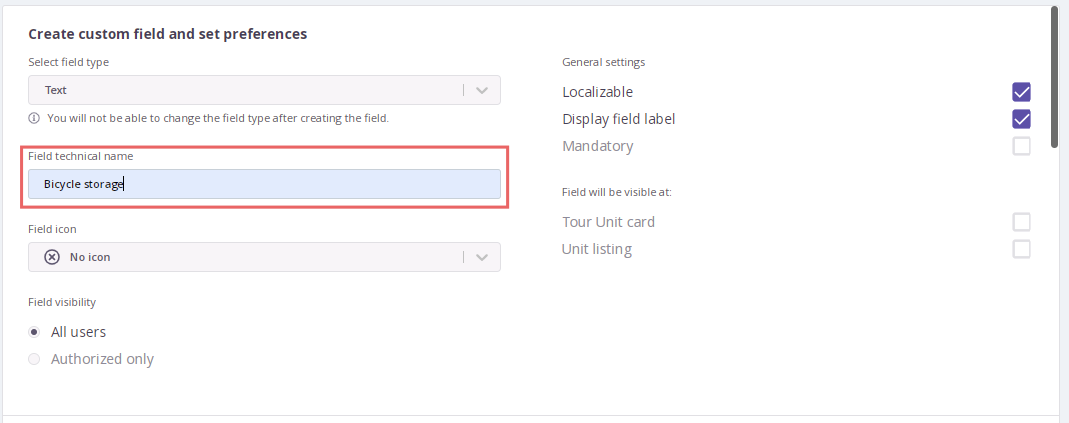
2) Set up field technical name. We also call it the working title, as that name is only visible for a Portal user in the Custom fields section. The field labels, i.e. the field name displayed in the Portal will be set up later.
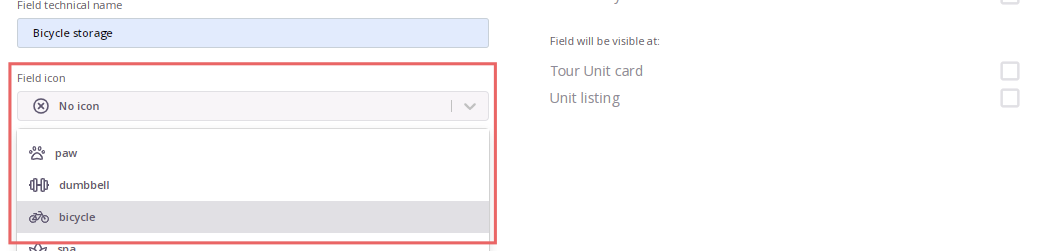
3) Select the icon that suits the field best. It is optional, but recommended, as it adds a better visual experience to the users. That icon is then presented in the showcase.
4) Set up visibility parameters: field visibility based on permissions and on the unit tour card and unit list. See the details above.
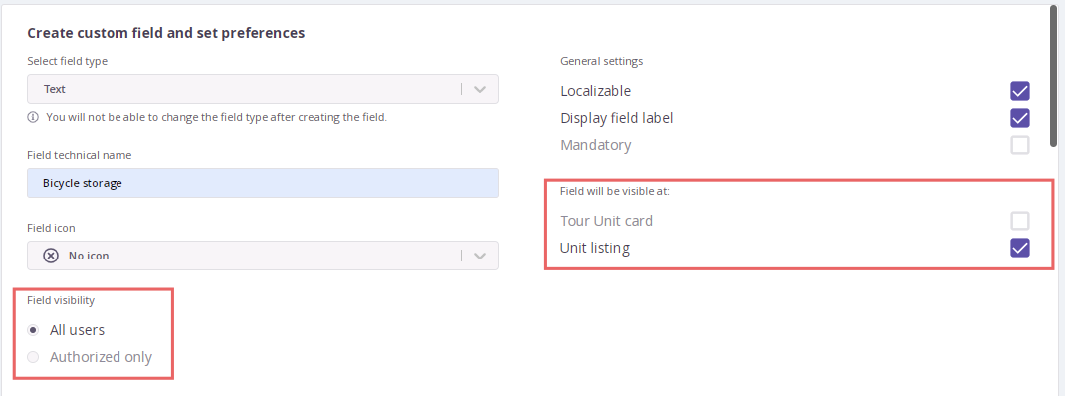
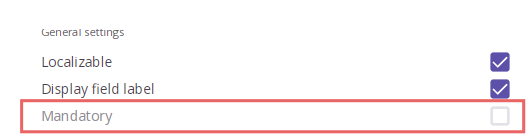
5) Check whether the field is mandatory to fill in when it belongs to the unit.
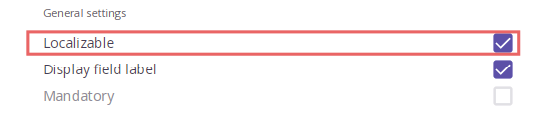
6) Mark field as Localizable in your want to set up field label and value also in Dutch, French, or German.
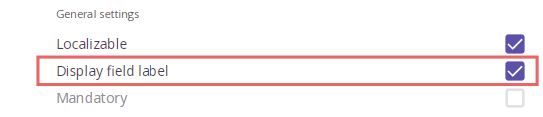
7) Mark Display field label if you want it to be presented in the showcase.
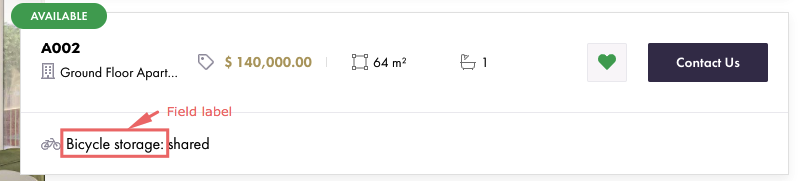
8) Set up field label. As mentioned above, that name is used in the showcase. If the field is marked as localizable its title (the one visible in the showcase) can be filled in 4 languages (English, Dutch, French, and German), with English set up as the main one.
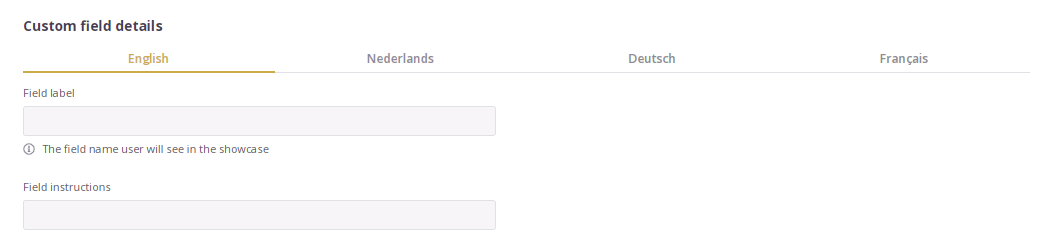
You can also add field instructions that will be visible in the tooltip on the field hover.
9) In case the dropdown field type is selected then the user is asked to fill in the values for the dropdown (in case the field is localizable one user can fill in the values for all four languages).
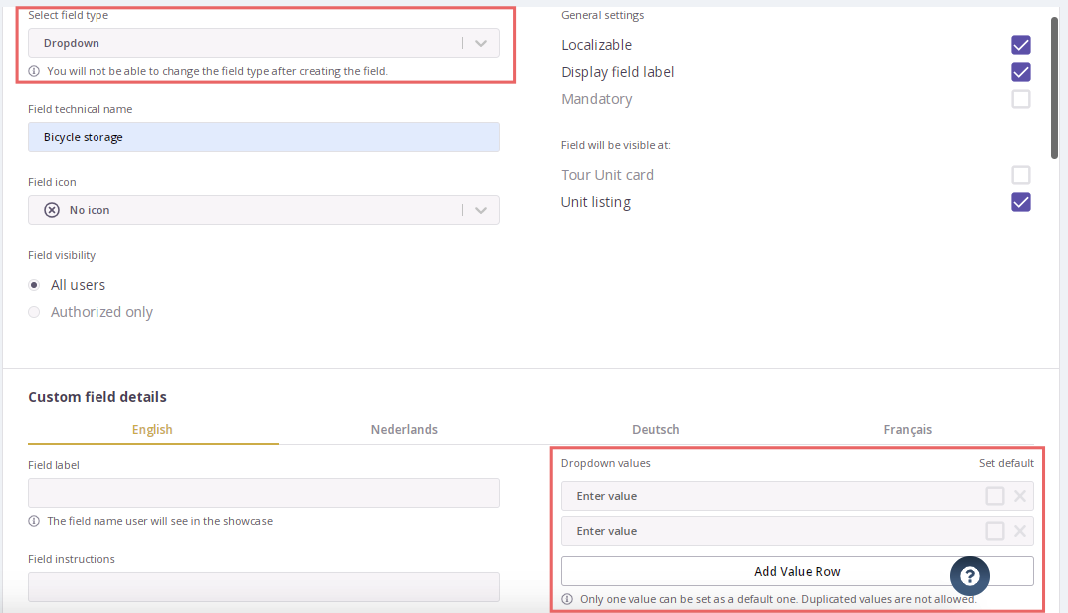
Please note that you can set one of the dropdown values as a default one.
10) And that is it. Don't forget to Save your changes. You can edit the field anytime.

🎉Congratulations🎉 You have just created your first Custom field.
💡Green dot 💚 on the Custom field in the list indicates that this Unit type is already assigned to one or more units in the project.
How to use the field once it is created?
Once you have created the custom field use Unit types functionality to connect the field to the units.
IMPORTANT
Once everything is set up go to Showcase Editor - Settings - Units - Unit Listing and switch Show custom fields ON.